How to install CentOS and Virtual Box for DevOps journey

In this article, I have given step by step procedure to install CentOS and Virtual Box setup in your machine for starting our journey in DevOps
What is CentOS?
- CentOS is an open-source operating system based on the Red Hat Enterprise Linux source code and built on the Linux kernel. It is a stable software with a high level of security.
Why CentOS?
Most of the corporate organizations, people prefer CentOS over RedHat Enterprise Linux(Paid)
Use YUM (Yellow Dog Updater) as a package manager
What is Virtual Box?
Open Source, Desktop virtualization software
Type -2 Hypervisor (Will explain in next blog)
How to download virtual box and CentOS..?
1. Virtual Box:
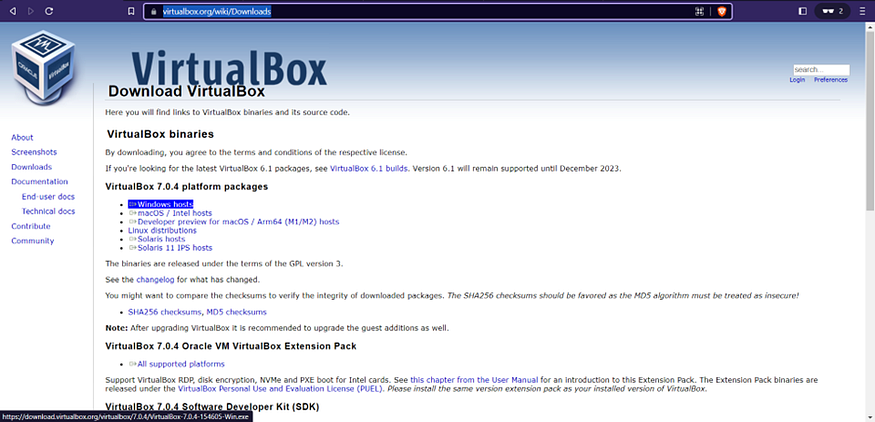
Step -1: Navigate to the https://www.virtualbox.org/wiki/Downloads and click on the hyperlink based on the OS platform
2. CentOS:
Step-1: Navigate to the https://www.centos.org/download/ and click on the X86_64 architecture hyperlink.(Depending upon the architecture of the machine)

Step-2: The links below the green bar show the mirror links which are located near your location and may have higher speed while downloading.
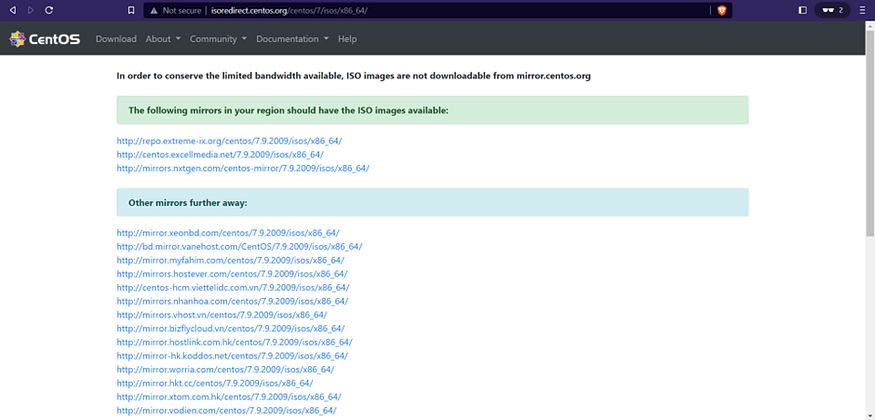
Step-3: Click on the CentOS-7-x8_64-DVD-2009.iso file and the file will be downloaded

Installation Process
Note: Click on the Right Ctrl button on the keyboard to come out from the CentOS
Step -1: Install the downloaded virtual box file and the below screen will be displayed
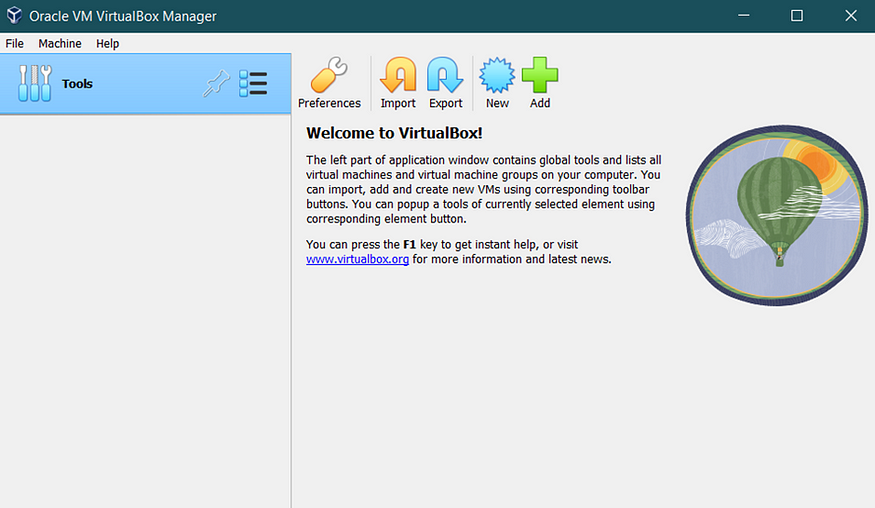
Step-2: Click New and add a name:
Name — centos ; Type- Linux ; Version — RedHat(64bit) ; Click Next

Step 3: Select 2GB of RAM at least

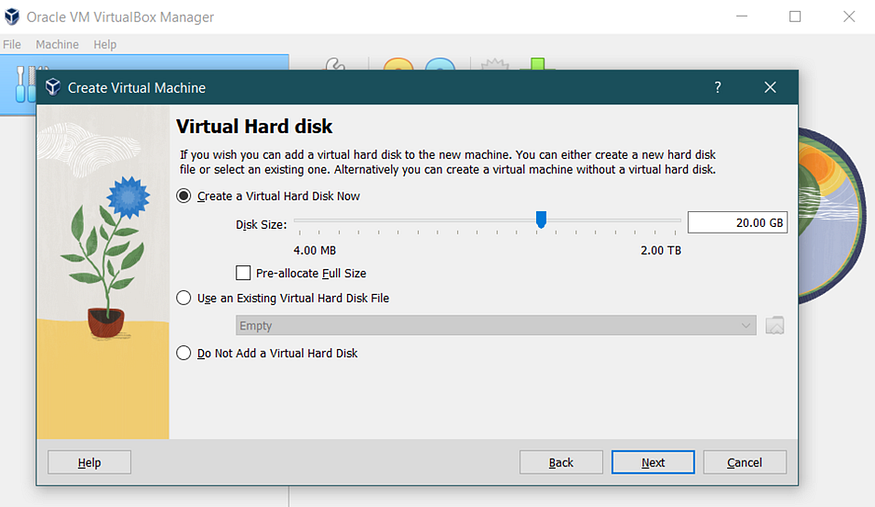
Step-4: Create a virtual hard disk of size 20GB
Step-5: Click Finish and you will see centos will be added. Now click Start
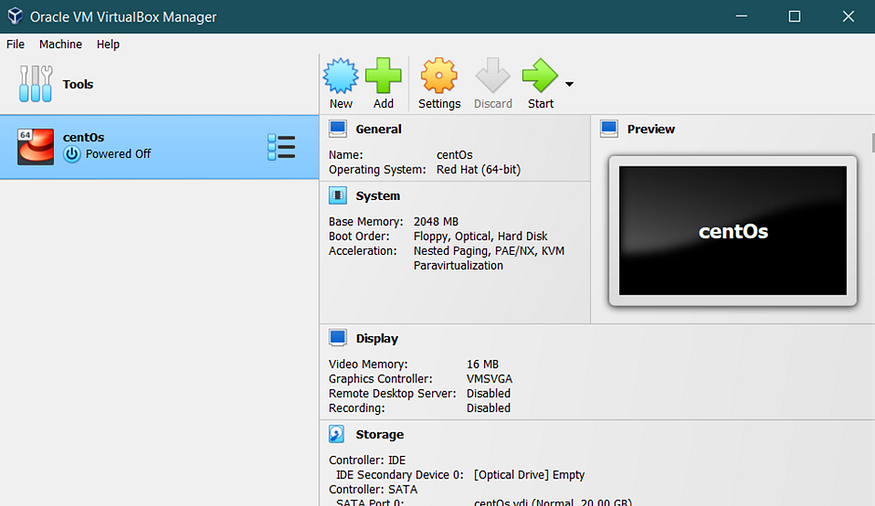
Step-6: Error will be thrown. A popup will be displayed. Now click Browse and select the .iso file which was downloaded from the CentOS website
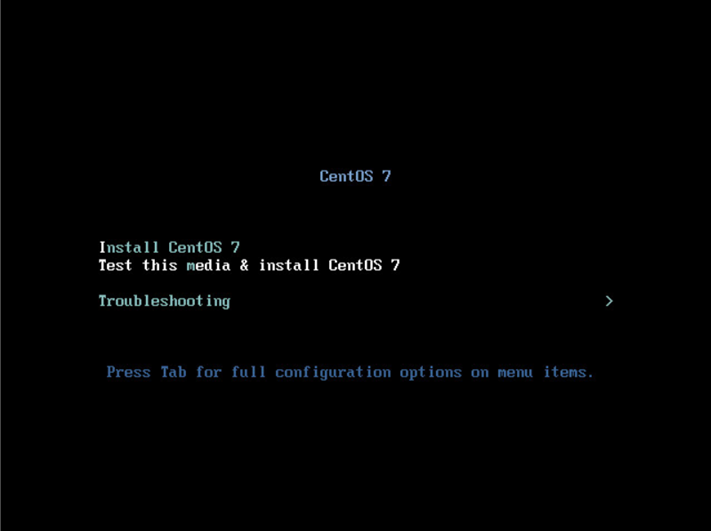
Step-7: Select Install CentOS 7 and click Enter
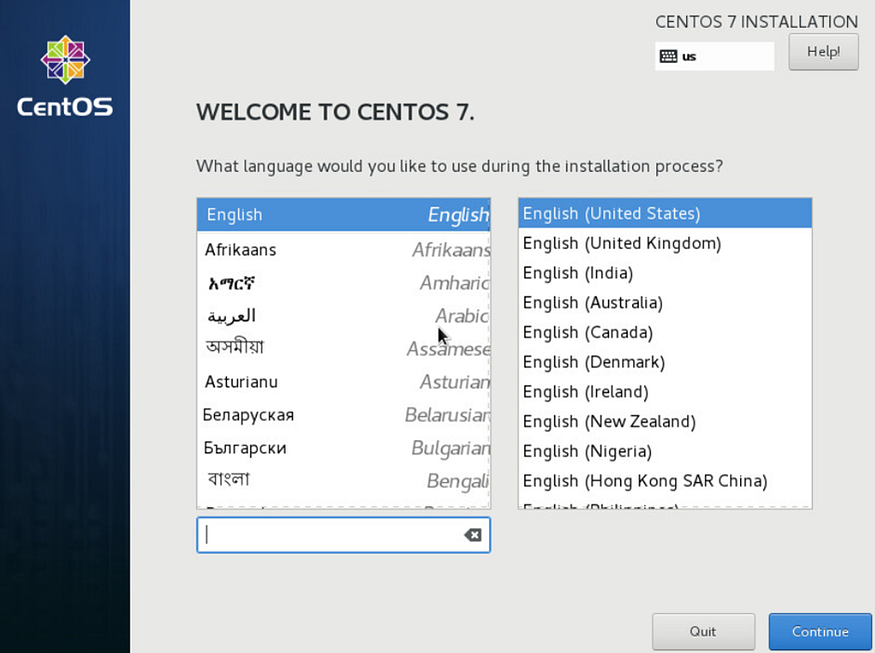
Step-8: Select the language and click continue
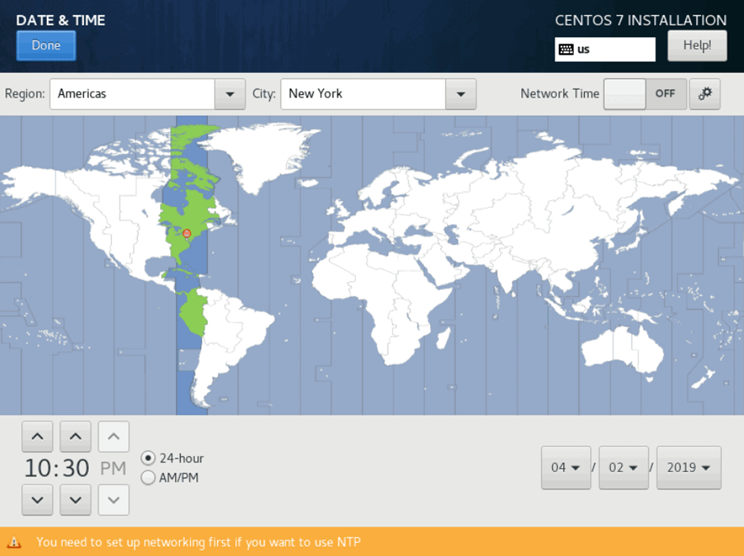
Step-9: Choose the Date and Time and set it as Asia in the Region and Kolkata in the city from the dropdowns
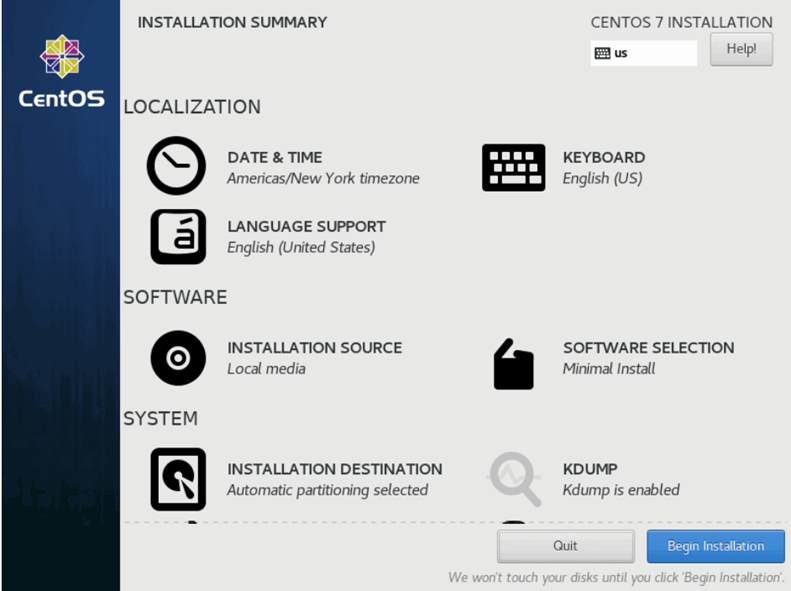
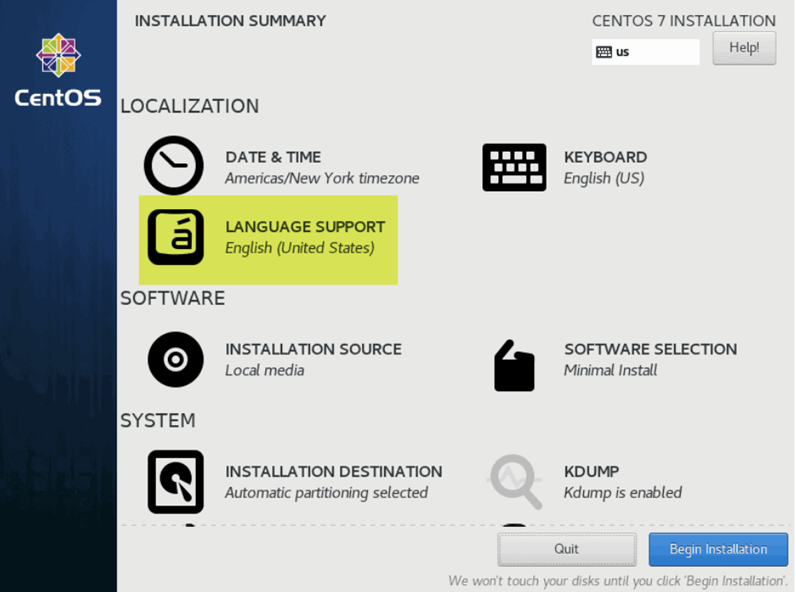
Step-10: Ensure Keyboard and Language support are set as English
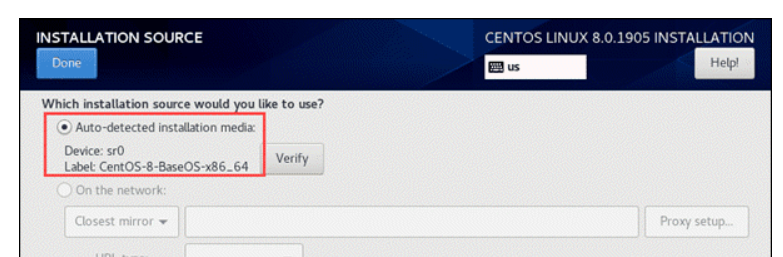
Step-11: Verify if the Installation Source is Local Media. Else click on Installation Source and select Auto Detected and click Done
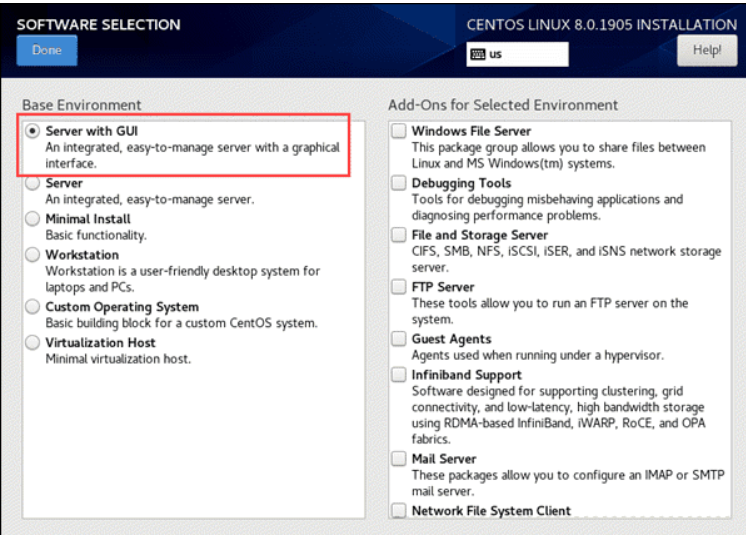
Step-12: Click Software Selection and select Server with GUI and click Done
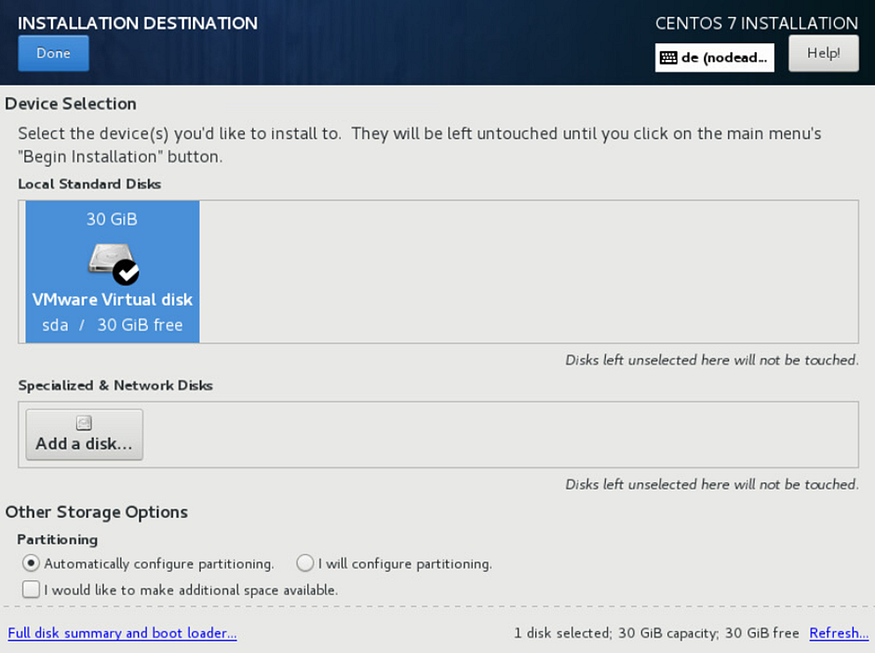
Step-13: Click Installation Destination and select the hardisk and click Done
Step-14: Click Begin Installation

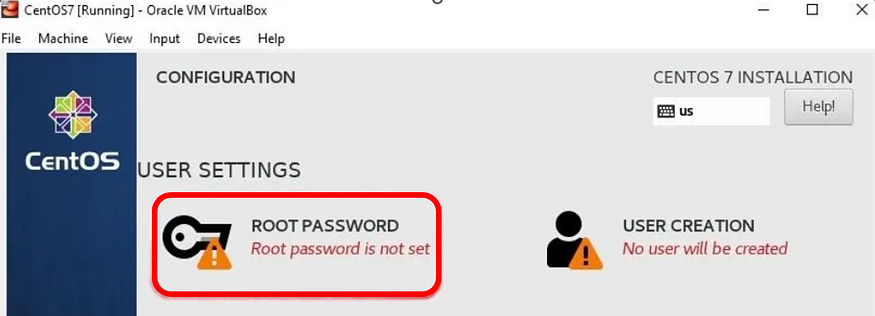
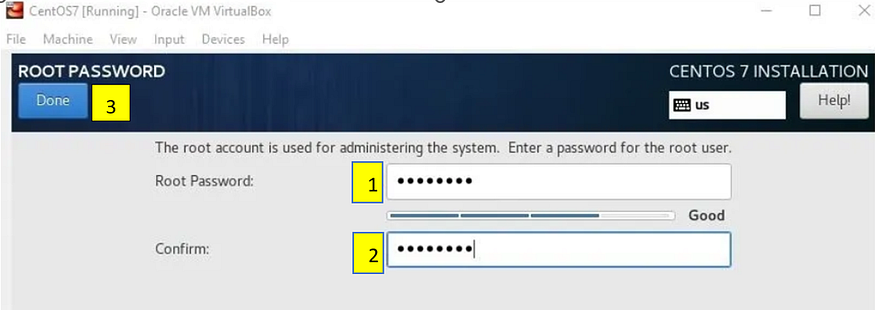
Step-15: Click Root password in the window and set the strong password and click Done
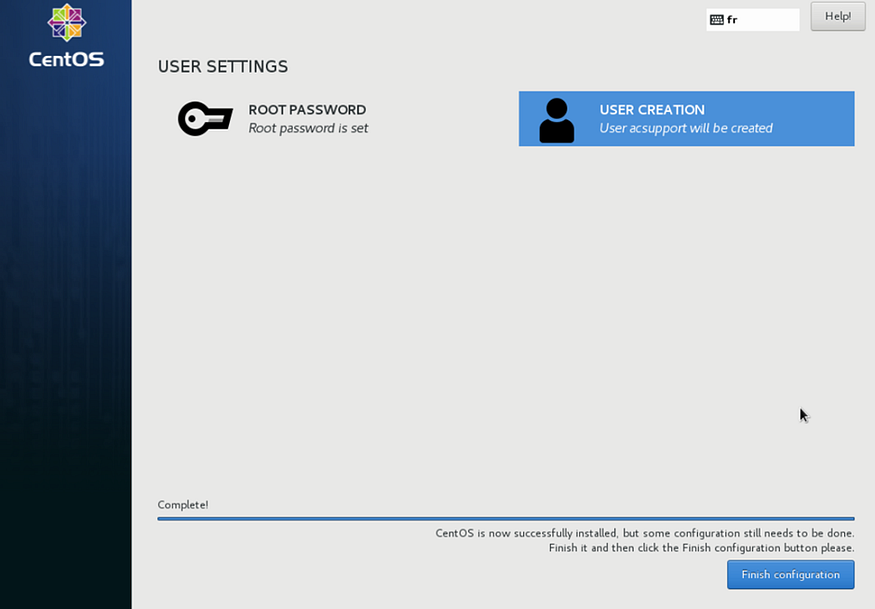
Step-16: Click User creation and provide the necessary details and click Done: (Below screenshot is for sample only)

Step-17: Click Finish configuration
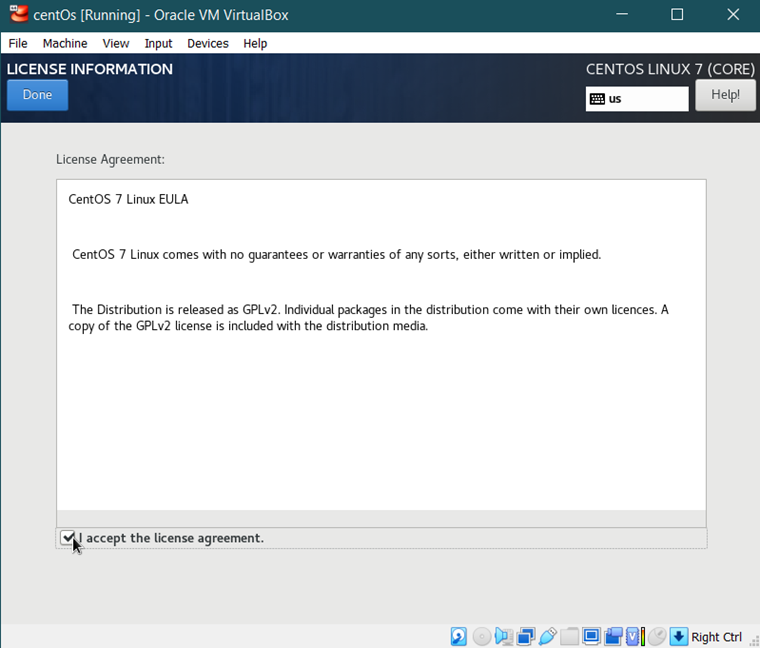
Step-18: Click on License Information if a warning is displayed as below and accept it
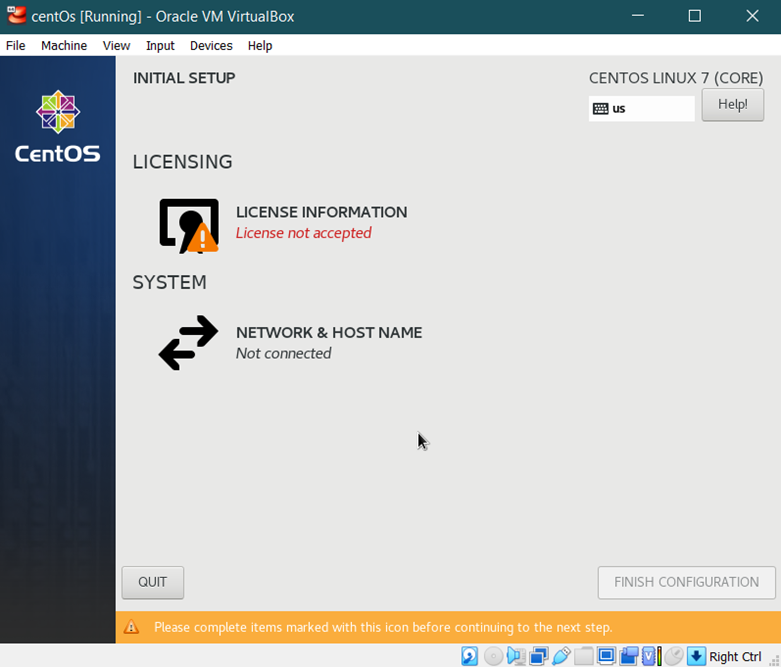
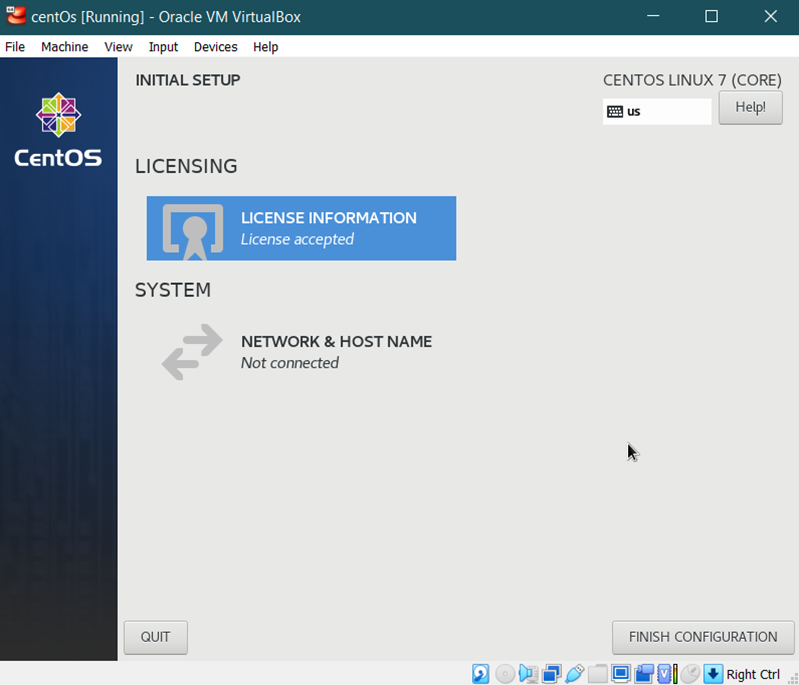
Step-19: Click on Network & Host Name and toggle on the Ethernet switch and click Done

Step-20: Click Finish Configuration and click Reboot..

Bingo......!
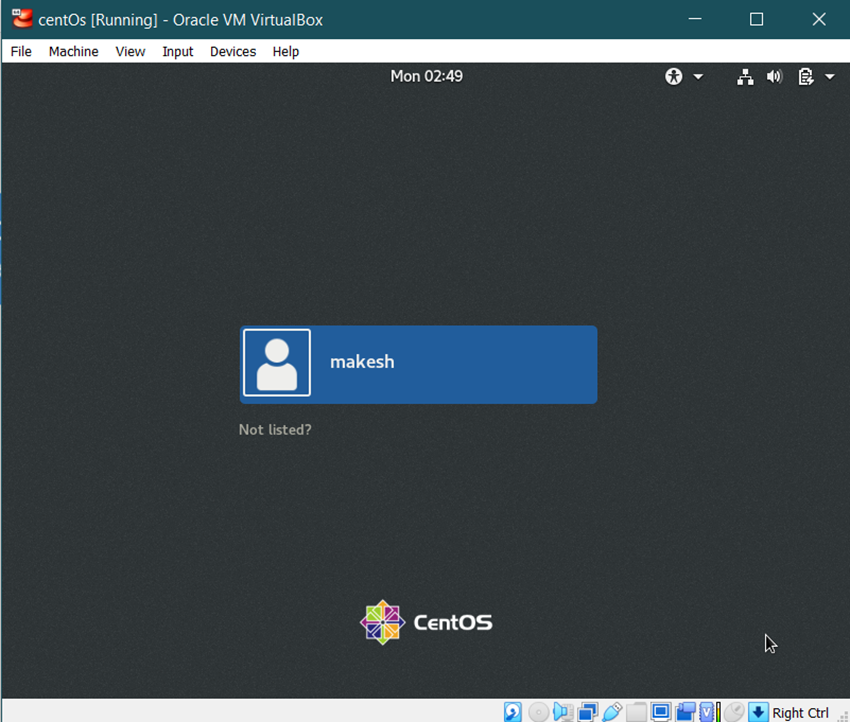
Step-21: Click Enter and Enter your password and login

We have successfully installed the VirtualBox and CentOS…!
Thanks for Reading. Happy Learning….!
Makesh


